Build a Flight Tracker with MyRadar Weather
Build a flight tracker on a MyRadar weather map: search for a flight, follow it over radar and weather overlays, and show its route, progress and landing time.
Oct 13, 2026 · Shell · TypeScript
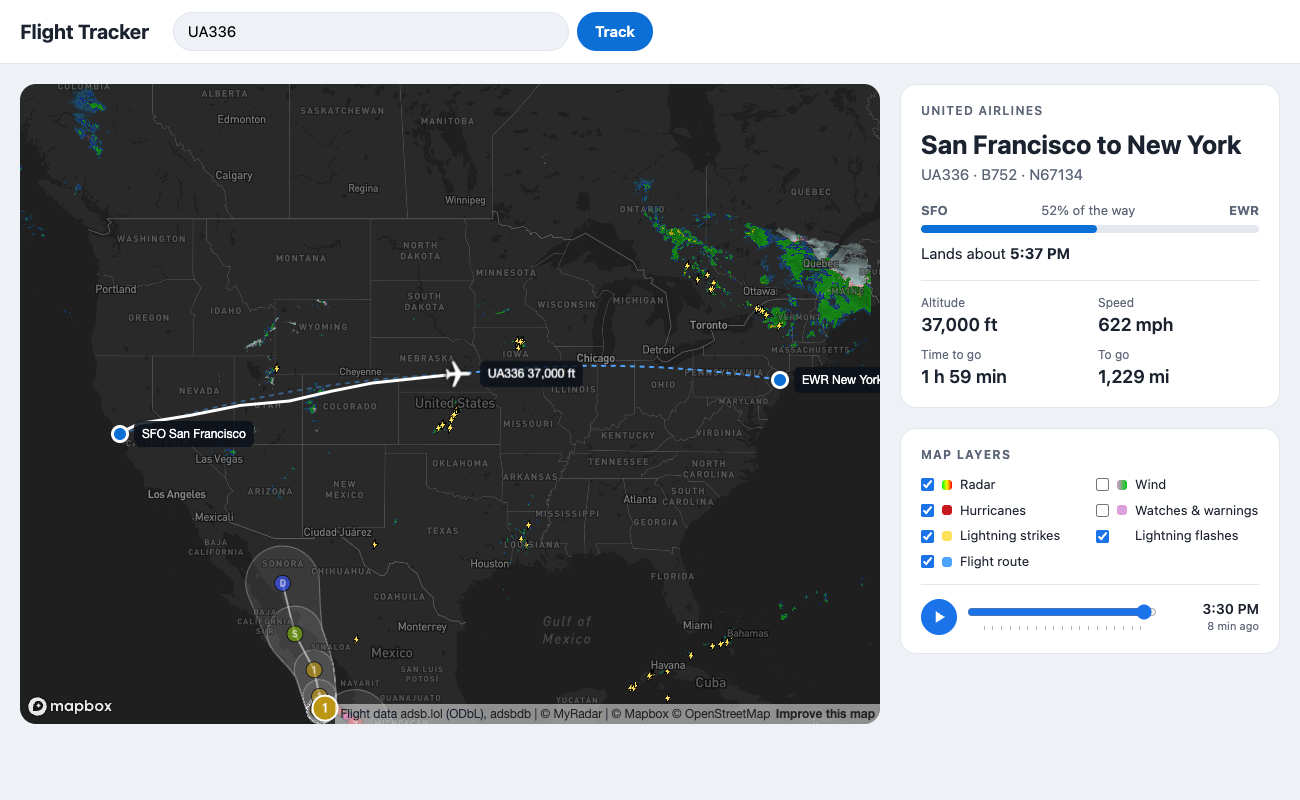
In this walkthrough you'll build a flight tracker on a MyRadar weather map: search for a flight, follow it live over radar and lightning, and see how far along it is and when it should land. It covers the parts that matter: the radar, the weather layers and their controls, finding a flight, drawing it, and working out its progress.
The snippets below are complete enough to build the app step by step, but they aren't copied
from a published project. For a finished app to run and read, see the flight tracker sample,
web-demo in the
MyRadar SDK samples repository. It uses the
same MyRadar layers and controls but goes further than this walkthrough: it searches
Flightradar24's live feed instead of adsbdb, so its flight code and file layout are different.
The quickstart below starts it from the command line.
You'll need:
- Node.js 20.19 or newer.
- A MyRadar API key and a Mapbox access token. See Requirements.
Flight data comes from two free services that need no key: adsbdb knows airlines and planned routes, and adsb.lol, a community ADS-B network, has live positions and recorded tracks.
Quickstart (command line)#
To see the finished sample running before you build your own, these commands
clone it, install it, write your keys to .env.local and start the dev server.
You need Node.js 20.19 or later; replace
your-myradar-api-key and pk.your-mapbox-token.
export MYRADAR_API_KEY=your-myradar-api-key
export MAPBOX_TOKEN=pk.your-mapbox-token
git clone https://github.com/MyRadar/MyRadar-SDK-Samples.git
cd MyRadar-SDK-Samples/web-demo
npm install
printf 'VITE_MYRADAR_API_KEY=%s\nVITE_MAPBOX_TOKEN=%s\n' "$MYRADAR_API_KEY" "$MAPBOX_TOKEN" > .env.local
npm run dev
Then open http://localhost:5173.
.env.local is git-ignored. Restart npm run dev after changing it.
1. Set up the project#
Create a Vite and TypeScript project and add mapbox-gl and the two MyRadar packages:
@myradar/mapbox for the radar and weather layers, and @myradar/controls for the layer
switches and time slider.
npm create vite@latest flight-tracker -- --template vanilla-ts
cd flight-tracker
npm install @myradar/mapbox @myradar/controls mapbox-gl
Put your keys in .env.local at the root of the project. Vite's template git-ignores it, and
exposes variables that start with VITE_ to your code:
VITE_MYRADAR_API_KEY=your-myradar-api-key
VITE_MAPBOX_TOKEN=pk.your-mapbox-token
Read them once in src/main.ts. Every MyRadar layer below takes the key as apiKey:
import mapboxgl from 'mapbox-gl';
import 'mapbox-gl/dist/mapbox-gl.css';

mapboxgl.accessToken = import.meta.env.VITE_MAPBOX_TOKEN;
const apiKey = import.meta.env.VITE_MYRADAR_API_KEY;
Run npm run dev and keep it running while you build; restart it whenever you change
.env.local. See Your API key for how to tell
whether the key is working.
adsbdb allows calls from any website, but adsb.lol doesn't, so the dev server forwards its
requests. Create vite.config.ts:
import { defineConfig } from 'vite';

export default defineConfig({
  server: {
    proxy: {
      '/adsb-api': {
        target: 'https://api.adsb.lol',
        changeOrigin: true,
        rewrite: (p) => p.replace(/^\/adsb-api/, ''),
      },
      '/adsb-traces': {
        target: 'https://adsb.lol',
        changeOrigin: true,
        headers: { Referer: 'https://adsb.lol/' },
        rewrite: (p) => p.replace(/^\/adsb-traces/, ''),
      },
    },
  },
});
The page (index.html) has a search box, the map, and two cards beside it: one for the flight
and one for the map layers.
2. Show live radar#
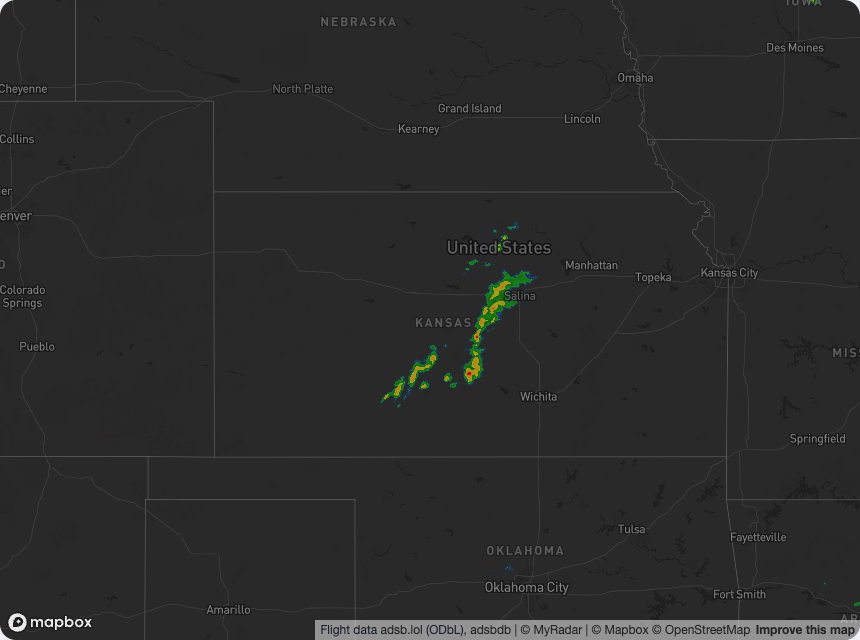
Create a dark Mapbox map and add a RadarLayer under the map's labels, so place names stay
readable on top of the weather:
const map = new mapboxgl.Map({
  container: 'map',
  style: 'mapbox://styles/mapbox/dark-v11',
  center: [-93.5, 41.5],
  zoom: 5,
  customAttribution: 'Flight data <a href="https://adsb.lol">adsb.lol</a> (ODbL), <a href="https://www.adsbdb.com">adsbdb</a>',
});

const radar = new RadarLayer({ apiKey });

map.on('style.load', () => {
  const labels = firstSymbolLayerId(map); // keep place names above the weather
  map.addLayer(radar, labels);
});
The radar loop starts playing as soon as its frames load. The customAttribution credits the
flight data services; adsb.lol's data license requires it.
3. Add weather overlays and a layer switcher#
Create the overlays and add them next to the radar. attachRadar syncs lightning to the radar
loop, so strikes follow the displayed time and flash inside the storms. Watches and warnings and
wind start hidden to keep the flight easy to see:
const warnings = new WarningsLayer({ apiKey, visible: false });
const lightning = new LightningLayer({ apiKey });
const hurricanes = new HurricanesLayer({ apiKey });
const wind = new WindLayer({ apiKey, visible: false });
lightning.attachRadar(radar);

map.on('style.load', () => {
  const labels = firstSymbolLayerId(map);
  map.addLayer(radar, labels);
  map.addLayer(wind, labels);
  warnings.addTo(map, { beforeId: labels, radarLayerId: radar.id });
  hurricanes.addTo(map, { beforeId: labels });
  lightning.addTo(map, { beforeId: labels });
});
Then fill the Map layers card with two controls. weatherLayerItems builds a switch for each
layer, and storageKey remembers the choices between visits. The TimeSlider plays, pauses and
scrubs the radar loop:
new LayerControl({
  items: weatherLayerItems({ radar, wind, hurricanes, warnings, lightning }),
  storageKey: 'flight-tracker-layers',
  theme: 'light',
  panel: false, // it sits inside the card
}).addTo('#layers');
new TimeSlider({ radar, theme: 'light', panel: false }).addTo('#timeline');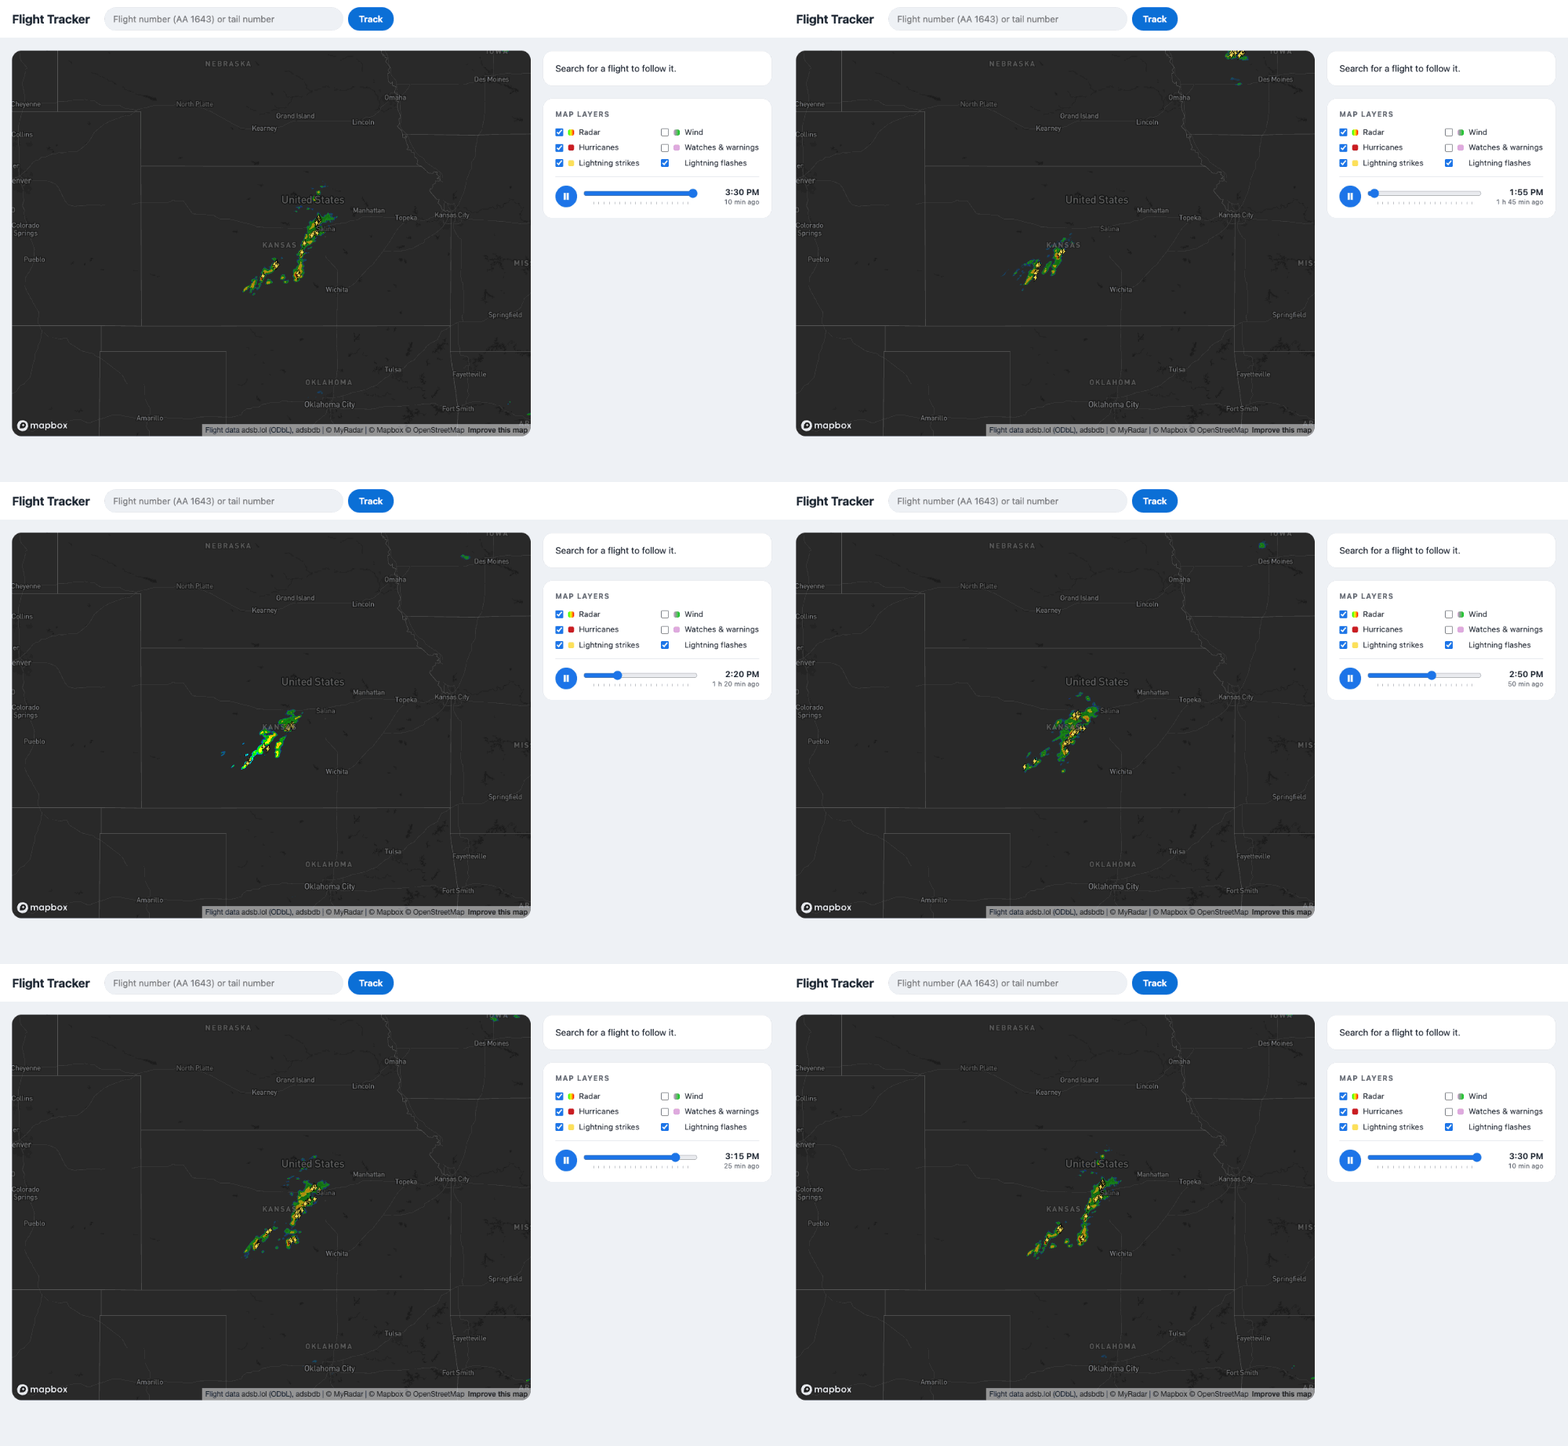
4. Find a flight#
People know flights by the number on their ticket (AA 1643), but aircraft broadcast a
callsign with the airline's ICAO code (AAL1643). adsbdb converts one to the other and also
knows the airline and the planned route:
export async function lookUpFlight(query: string): Promise<FlightInfo | null> {
  const res = await fetch(`${ADSBDB}/callsign/${encodeURIComponent(query)}`);
  if (!res.ok) return null; // 404 for unknown flights
  const route = (await res.json()).response?.flightroute;
  if (!route) return null;
  return {
    callsign: route.callsign_icao ?? query,
    flightNumber: route.callsign_iata,
    airline: route.airline?.name,
    origin: route.origin && toAirport(route.origin),
    destination: route.destination && toAirport(route.destination),
  };
}
adsb.lol then finds the aircraft broadcasting that callsign, anywhere in the world. Write a
findAircraft function that asks adsb.lol (through the /adsb-api proxy) for
/v2/callsign/…, then /v2/reg/… so tail numbers work too, and a fetchTrack function that
loads the positions the aircraft has reported on its current leg from /adsb-traces.
Check the route#
Don't trust the route blindly. Airlines reuse a flight number for several legs a day, and adsbdb
stores one route per number, so the route it returns is often for a different leg. Showing it
would make the progress and landing time confidently wrong. routeFits keeps a route only when
the aircraft is close to it and pointed at the destination:
export function routeFits(a: Aircraft, origin: Airport, destination: Airport): boolean {
  const direct = distanceNm(origin, destination);
  const detour = distanceNm(origin, a) + distanceNm(a, destination) - direct;
  if (detour > Math.max(150, direct * 0.25)) return false;
  // near the airports the aircraft may be turning in any direction
  if (a.heading === null || distanceNm(a, destination) < 100 || distanceNm(origin, a) < 100) return true;
  const off = Math.abs(((a.heading - bearing(a, destination) + 540) % 360) - 180);
  return off < 60;
}
It can't catch everything: an aircraft that happens to be on the line between the wrong two airports still passes. For dependable routes and schedules, use a commercial flight data provider.
Handle the search#
The search handler puts it together. It shows the flight as soon as the aircraft is found, and draws the recorded track when that slower request arrives:
const info = await lookUpFlight(query);
const [aircraft] = await findAircraft(info?.callsign ?? query);
if (!aircraft) {
  card.textContent = `${query} isn't flying right now.`;
  return;
}
const routeKnown = info?.origin && info.destination && routeFits(aircraft, info.origin, info.destination);
current = {
  aircraft,
  label: info?.flightNumber ?? aircraft.callsign,
  airline: info?.airline,
  origin: routeKnown ? info.origin : undefined,
  destination: routeKnown ? info.destination : undefined,
  track: [],
};
showFlight();
flightLayer.fit(current);
// the recorded track is a slow request; draw it when it arrives
const flight = current;
fetchTrack(aircraft.hex)
  .then((track) => {
    flight.track = track;
    if (current === flight) showFlight();
  })
  .catch(() => {}); // no track, just the live position
A timer refreshes the position every 10 seconds with fetchPosition, adding the previous
position to the track so the line follows the aircraft.
adsb.lol is a volunteer network and can be slow or busy, so give every request a timeout (for example 20 seconds), retry when adsb.lol asks you to slow down, and say so on the card if a search fails.
5. Draw the flight#
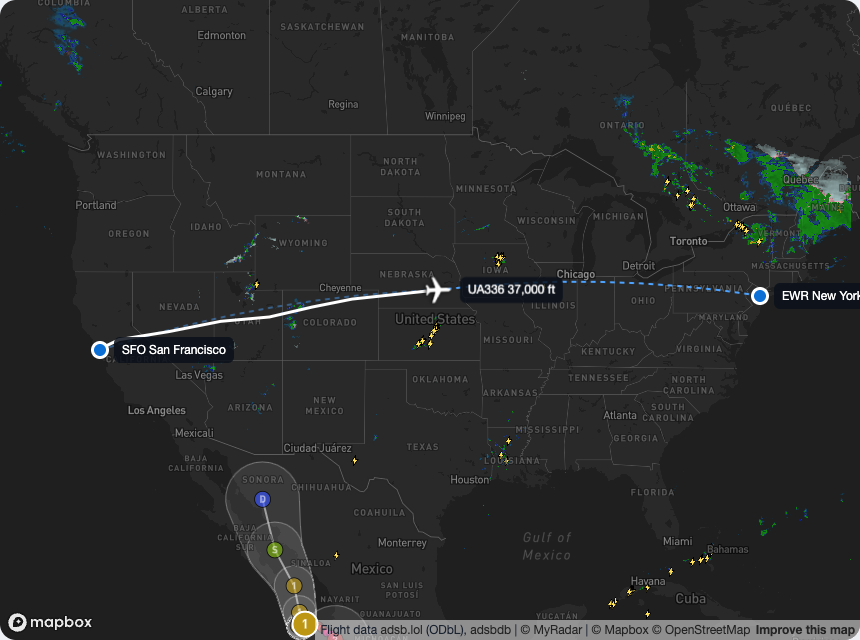
A small FlightLayer class of your own draws the flight. The planned route is split at the
aircraft, so the part already flown can be drawn fainter than the part ahead:
if (f.origin && f.destination) {
  route.push(line(greatCircle(f.origin, here), { ahead: false }), line(greatCircle(here, f.destination), { ahead: true }));
}
this.setData('route', route);
this.setData('track', f.track.length > 0 ? [line([...f.track, [a.lon, a.lat]], {})] : []);
One dashed line layer draws both parts, with an expression choosing the opacity:
paint: {
  'line-color': '#4da3ff',
  'line-width': 2,
  'line-dasharray': [2, 2],
  // the part already flown is fainter than the part ahead
  'line-opacity': ['case', ['get', 'ahead'], 1, 0.45],
},
The route follows great circles, the shortest paths on the globe, so long routes curve like real
ones. The aircraft and the airports are HTML markers (mapboxgl.Marker), so their labels are
styled with CSS, and the plane icon is rotated to the aircraft's heading.
Install the layer last in the style.load handler, with no beforeId, so the flight is drawn
above the weather and the labels. FlightLayer has a visible property, so it can join the
layer switches:
items: [
  ...weatherLayerItems({ radar, wind, hurricanes, warnings, lightning }),
  { id: 'flight', label: 'Flight route', swatch: '#4da3ff', target: flightLayer },
],
Search for a flight that's in the air: an airline flight number such as UA 2200, a callsign
such as UAL2200, or a tail number. To find one, open the adsb.lol map and
click any airliner. The map frames the trip, and the track fills in a few seconds later.
6. Show progress and the landing time#
With a trusted route and the live position, the card can work out how far along the flight is. Measure the distance flown and the distance to go, and estimate the landing time from the ground speed:
const flown = distanceNm(f.origin, a);
const remaining = distanceNm(a, f.destination);
const progress = Math.round((flown / (flown + remaining)) * 100);
const hours = a.speed && a.speed > 50 ? remaining / a.speed : null;
const eta = hours === null ? null : new Date(Date.now() + hours * 3_600_000);
progress sets the width of the progress bar, and eta is shown as "Lands about 4:07 PM". The
estimate runs early while the aircraft cruises with a tailwind and settles as it descends.
Flight data comes from public feeds, so the card writes airline names, airports and
registrations with textContent, never as HTML.
That's the complete app.
7. Ship it#
- Build:
npm run buildwrites a static site todist/. - Proxy adsb.lol in production. The dev-server proxy only runs during development. Your
host needs the same two routes,
/adsb-apiand/adsb-traces: a CDN rewrite (for example a CloudFront behavior), a serverless function or a small reverse proxy all work. adsbdb needs no proxy. - Keys: both keys end up in the browser bundle. Restrict the Mapbox token to your domains, and use a MyRadar key issued for this site.
- Attribution: keep the MyRadar, Mapbox, adsb.lol and adsbdb credits visible in the map's attribution line.
Where to go next#
- Add a Follow button that keeps the aircraft centered: call
map.easeTo({ center: [a.lon, a.lat] })inshowFlight. - Show what happens next on a timeline: the estimated start of the descent (about 3 nautical miles for every 1,000 ft of altitude) and the landing.
- Switch radar products with
radar.product = 'hdRadar', or react to the loop with events:radar.on('frame', ({ date }) => …)fires on each new frame. - See the overview for everything the SDK can show, and the package READMEs for the full API.